An imperfect but fairly easy method (no sewing machine required)
By Kitty
As promised, here’s a relatively simple way to add filter pockets to your two-layer masks!
Some caveats before you begin
If you ordered or were given a mask from Felix & Kitty before November 2020, it was most likely a two-layer one, since that’s what was officially recommended back then. If your mask if from the time after we updated our mask construction (to have either filter pockets or three layers), you don’t need this tutorial.
FYI, if you think it’s a good idea to add a filter pocket to a mask that already has three or more layers, you might want to reconsider. Masks with more layers aren’t necessarily any safer, and depending on what you use and how thick the final product ends up being, may be considerably LESS safe.
NOTE: If you want more info on which materials benefit from multiple layers and which you shouldn’t double up, find it here.
Will this tutorial work for all mask styles?
Yes and no. You can use the same principles for any style of mask, but that doesn’t mean it’s always a good idea.
In general, the basics of this tutorial will work fine with any mask with some 3D contouring that does NOT contain any pleats. These are two examples (an Anteater mask and a “Put on a good face” mask, in this instance) of the type.


I wouldn’t add a filter pocket to a totally flat mask (like those plain rectangles with ear loops), because this style already tends to have major gaps around the edges due to the fact that they don’t make any provisions for the mountains and valleys of your face.
The added stiffness of the filter pocket will probably make the gaps even worse. Also, since flat masks just sit, well, FLAT, a filter would end up plastered against your nose and mouth, which could be really unpleasant, depending on the material.
I also wouldn’t add a filter pocket to a pleated mask, mainly because a flat filter sitting on the inside of the pleats would 1) render them kind of pointless and 2) shift around too much.
The whole point of pleats is to open and close to accommodate facial movement as you talk and move your mouth. A filter would just sit on the pleats and restrict them from their fold/unfold motion, and even get pulled out of place when it gets caught up in that motion.
In fact, following a good deal of experimentation (the reason why this tutorial is much later than I originally intended), I believe filters just don’t play nicely with pleats. More on this in an upcoming blog. In the meantime, if you love pleated styles, maybe stick with three layers instead of filter pockets.
Materials you’ll need
If you have a sewing machine and are comfortable using one, great. Otherwise, a needle and thread will work fine. Or if you’re not into hand sewing, a reliable glue gun that uses non-toxic, washable glue that bonds fabrics will do as well.
You will need some kind of fabric or other material which will withstand repeated cleaning. If you machine-wash and heat-dry your masks, make sure your filter pocket material will stand up to the same treatment.
Unless you have a machine for finishing fabric raw edges, or really love hand-finishing them with a needle and thread (in which case you’re a bit peculiar), stick to materials that will not fray. Felt, heavy knits without too much stretch, and non-woven fabrics are all options.
Other than that, you’ll want a pen or pencil, some paper, and a pair of scissors. A few pins and a ruler are helpful but not essential. If you don’t have pins, you may want a few clothespins or paper clips, or even bobby pins.
The prep
If I were you, I’d pre-wash and dry whatever fabric you’re using, even if it’s not supposed to shrink. You don’t want your filter pockets doing something unexpected in the laundry after you’ve gone to all that trouble adding them. If they do shrink, they can distort the mask and cause gaps around its edges, which is a big safety no-no. You have been warned.
Step 1: The pattern
NOTE: You can skip this step if you’re only doing one or two masks, and just trace directly onto your fabric. But if you have more than a couple to do, it’s much easier to make a paper pattern first.
To make the pattern, lay your mask on a piece of paper. Flatten out one of the side edges of the mask (where the straps or elastics are attached) against the paper, and keep flattening toward the interior of the mask as far as you can go before the shape gets too 3-dimensional to stay down. Trace around the flattened portion only.

Once you’re done tracing, remove the mask, and draw a line (use a ruler of you have one handy) connecting the ends of your traced lines. This connecting line is shown in blue in the photo below.

Cut out the shape with your scissors.

Pin (or just hold, if you don’t have pins) the cut-out paper pattern against the inside of your mask to double-check that it’s the right shape and size. Trim the paper down if needed.

If there’s any chance you might confuse which way points up (if it even matters; it won’t for masks whose shape is symmetrical up and down), draw an arrow on the pattern to remind yourself.

Step 2: Cutting out your pattern pieces in fabric
Pin your paper pattern to your chosen fabric. If you don’t have pins, you can just trace around the paper with a Sharpie or chalk.

Cut out the shape. If you traced the outline with a sharpie, try to cut off all the Sharpie ink, or the piece may end up too big.

Now, FLIP OVER your pattern piece and pin (or trace). Cut out the other filter pocket. If you don’t do the flip, you’ll end up with two lefts (or two rights). Of course, if your fabric doesn’t have a wrong or right side, this may not matter at all.

Now you have two mirror-imaged pieces of fabric!

Step 3: Attaching the filter pocket to the mask
If you’re going to be sewing, pin one of the fabric filter pocket pieces to the INSIDE of your mask, right side up (wrong side of pocket fabric facing the mask lining). If you don’t have pins, you could just hold it with your hand, if you’re fairly confident with your hand-sewing skills. Or you can use paper clips, small clothespins, or bobby pins to hold the pocket onto the mask while you sew.

Thread a needle. I used a contrasting colour thread so you can see it more clearly, but you’ll probably want to use matching thread, if you have any. I also used a HUGE needle, much larger than you want, again so it shows up better in the photos. Seriously, use a normal-sized needle; the big one was a pain to shove through the fabric layers.

Remember, you are only sewing on the pocket where it touches the EDGES of the mask, not the bit that opens into the interior. This is the pocket opening, so don’t sew it closed. The next photo shows the most logical place to start the sewing.

I’m not going to attempt to teach you hand sewing stitches here; there are loads of tutorials out there if you have no idea where to begin. I’m using a simple overcast stitch, which isn’t any better or worse than many other possible stitches.

As you can see, my stitches are neither even nor perfect. I don’t much like hand-stitching, and I wanted to get this tutorial out quickly more than I wanted to make perfectly spaced beautiful stitches. Remind yourself that it doesn’t have to look pretty to do the job, and don’t stress too much about your stitch quality, as long as everything stays on securely. Just keep sewing around the edge.

When you reach the end, tie off your thread securely so your sewing doesn’t come undone, or back-stitch several times. Remember not to stitch the opening of the filter pocket closed. Huzzah! You’re done. With one side, anyway.
Now you do the same on the other side. I sewed mine on by machine for comparison.


IF YOU ARE USING GLUE: Run a thin line of glue on the WRONG side of your filter pocket pieces, around the edges which will be attached to the mask. Don’t put glue on the edge that will become the pocket opening! Following manufacturer’s directions for your glue, adhere the pocket to the inside edge of the mask.
Using the filter pocket
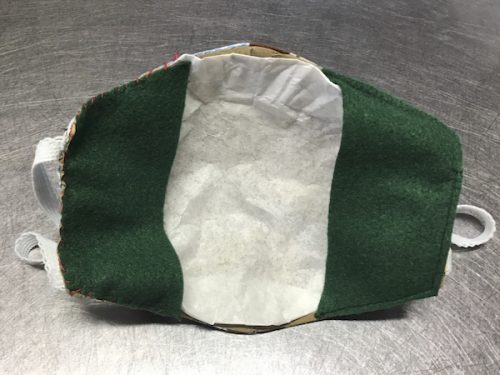
I tested out my new filter pockets using a coffee filter, but you can use any filter material you prefer, so long as it’s safe and reasonably breathable. If you’re not sure which one is for you, you might want to review the pros and cons of some options here.

With CLEAN hands, fold the filter to make it fit, if needed. Tuck the edges securely into the pockets on both sides to make sure they’ll stay put.


Push the middle of the filter into the bowl of the mask to keep it somewhat clear of your face. Now the mask and filter are ready to use.
Remove the filter after each use, and discard. If it gets damp, you should replace it immediately, as soon as you can get your hands clean. ALWAYS launder the mask before re-using!

Remove the Filter 
Discard the Used Filter
So is this method of attaching filter pockets ideal?
Well, no. Of course not.
This tutorial lets you salvage those two-layer masks you acquired before the guidelines got changed on us, so you can get a bit more use out of them. It isn’t meant to replace masks with purpose-built filter pockets, and definitely won’t do a perfect job — any filter you use with this method WILL touch your skin directly, and you could have a hard time keeping it clear of your nose and mouth.
When I make masks with filter pockets from scratch, the pocket is designed to be a structural part of the mask, and covers the masks’s whole interior surface (the bits that go over your airways, anyway). The filter then goes between the outer layer of the mask and the filter pocket/lining layer, meaning the filter itself never directly touches you. This could be important; for example, some filter materials can be too abrasive when placed against sensitive facial skin.
This also means any filter will sit much more securely within the pockets with no danger of slipping out. Since the filter pocket is made to follow any 3D shaping the mask itself has, the filter is kept lifted off your face, so you don’t accidentally get a noseful of filter if you breathe in too suddenly.
All the same, if you follow this tutorial method, you end up with masks that are compliant with the official recommendations, provided you use the right filters with it. While I didn’t love the feel of the filters against my skin when I tested this out, it was perfectly serviceable, and still far more comfy than those one-size-fits-none disposable masks.
What to do with two-layer masks (if you can’t be arsed to do all this sewing)
I ended up donating my entire stock of two-layer masks (which I already had made when the guidelines changed) to a homeless shelter after adding filter pockets, which is a sight better than wasting them.
If you have a sewing machine (or just a needle and lots of free time on your hands), but would prefer to switch to purpose-built masks with filter pockets and/or three-layer masks, you could do the same.
Or just sanitize and donate them as-is. Seriously, ANY mask is better than no mask at all, and your local shelter will be glad to have them, filter pocket or no. They also have the option of using two masks at once, one over the other, to get more layers (you could do this too, if the masks materials are breathable enough and the double elastic doesn’t bother your ears). You never know — you could save someone’s life.
Next time on Aunty Kitty’s Mask Adventures
I’ll be trying to come up with a mask style with LOTS of extra breathing space to compensate for that third layer. And no pleats, so it’s filter pocket-friendly for those of us who want one. But it’s somehow still got to accommodate longer chins or large beards, sans pleats. A challenge indeed.
Also, hopefully, it will be simple enough in design and construction so it’s relatively affordable. We’ll need that, since it’s been officially made very clear that we should all have several masks in rotation at any given time (because we really are supposed to change them whenever they get damp or soiled).
Winter is here, Kittens. That means your mask will get soggy from condensed exhaled breath when you go outside, so make sure you have two or three extra masks (sealed in a clean zippy bag) stowed in your purse/knapsack/bum bag/cleavage at all times.
Until next time, happy crafting!