Blog

The weather outside is frightful

(But these masks are quite delightful!)

By Kitty

In normal years, when the holiday season arrives, I head down a deep dark hole and hibernate there until all the party-goers have gone to sleep it off and it’s safe to re-emerge.

But not all people are misanthropic goats like me, and some of them even want to celebrate Christmas/Winter Solstice/Kwanzaa/Diwali/Hanukkah/Las Posadas/non-denominational holiday of choice with family and/or friends and/or attractive strangers, pandemic or no pandemic.  

This gave me to think.  You, being all sociable and well-adjusted and the like, are probably getting dressed up and sallying forth sometime this month.  And you likely don’t want to top off your glamorous outfit with a mask you got out of a ten-pack in Surgical Blue or Grim Reaper Black.

Can masks be a fashion statement?

Unequivocally, yes.  Some masks absolutely can, the operative word being “some.”

Like any other item of clothing, I think masks can project certain messages.  They can cover the full spectrum, ranging from “I’m covered enough not to be illegal; can’t be arsed to do laundry too” (think ill-fitting, one-size-fits-none disposable masks that gapes open at the top and sides) all the way to “I’m mysterious, alluring, and something fascinating awaits discovery beneath.”  

Which latter is what I’m hoping to evoke with our latest style.  Bit ambitious for a simple mask, maybe.  But designers without ambition are like eggnog recipes without rum: they exist, but shouldn’t.

Compare and contrast the following two concepts:

The Sparrowhawk mask

This is the mask style for people who don’t mind being surreptitiously stared at.  

If ever a mask could be said to make a statement, this one does.  Co-ordinate one of these with your office suit or party dress, and suddenly the face mask gets elevated from merely utilitarian to the perfect finishing touch to a thoughtful ensemble.

Here are several examples of the breed, both plain and embellished:

Pros, cons, and undecided

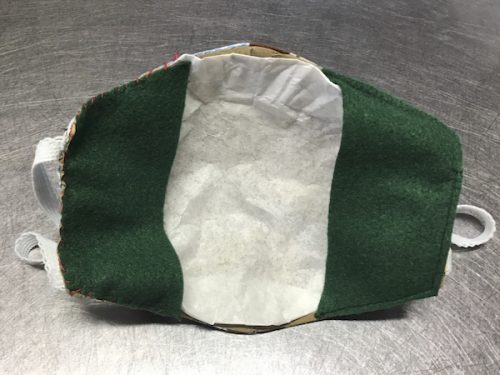
The geometric, angular design forms what can only be described as a beak, which projects far enough off your face to give you loads of breathing room.  The extra 3D space is definitely a pro.

It’s very structured, with a three-layer mask folding into side panels that are at least six layers thick.  It’s the face mask equivalent of a super-secure, ultra-modern skyscraper.  Just so we’re clear, the part directly over your breathing passages contains only three layers, because you still need to breathe.  It’s a myth that thicker is better, beyond a certain point.

Is all that a pro or con?  It’s a pro if you prefer a solid-feeling mask that stands upright on your face.  It’s a con if it feels too rigid for you, and you’d rather have something a bit cuddlier and more flopsy-soft.

The extra layers at the side panels definitely forms a better barrier, and makes them sturdy enough so gaping is generally a non-issue.  But the trade-off is that not as much air can move through those 6 plies, which bothers some people and others don’t even notice.

I personally find the panoramic height of the “beak” compensates for any restriction through the sides, and the three layers over my nose and mouth allow more than enough air flow.  I went for a brisk hike in a Sparrowhawk mask and had no trouble at all.  In fact, I think this might become my go-to style, because I like the solidity and the extra vertical space over my nose.  Plus it does look so interesting.

But if you’re highly sensitive to the least reduction in breathability, you might be best off in a mask designed mainly for easy breathing, like the Gondola mask.  There’s a certain charm to its Empty Child aesthetic, if you’re into that (if you don’t do Doctor Who references, think WW2 gas masks).

And we’re off to the ball!

The drama of the Sparrowhawk mask lends itself especially well to ornamentation.  I rummaged through my box of shiny things, and put together a few fun possibilities for your next party, special event, or just showing your festive spirit at work:

By the way, all of these embellished masks are being offered for sale here while they last.  We’ll match each one sold with a mask to be donated to a local shelter (especially in child sizes and unusual sizes, which are harder for them to come by).   

We have enough special materials left to make another one or two of some of these, while others are really one-of-a-kind.  They’re gone when they’re gone.

You can find regular (undecorated) Sparrowhawk masks here.  These can be made in any number of fabrics from our vast fabric galleries to match your outfit, so your imagination is the only limit.

Happy holidays to one and all!

Is this the best mask of them all?

Or, better late than never.

By Kitty

In this instalment of our continuing adventures in mask making:

  • Old Aunt Kitty eats a helping of humble pie, with a side of crow
  • We encounter a mask style that may just be the best ever
  • We are reminded that wet masks are bad, and unimpeded vision is good

The hunt for the perfect seasonal mask

So after I spouted off at some length about the latest official mask recommendations and the pros and cons of assorted filter materials (herehere, and here), I turned to the task of creating a new style of mask with some quite specific requirements.

  1. The shape must allow maximum ease of breathing, while being able to accommodate a filter pocket for those who wanted to use disposable filters.  Now that we’re supposed to have a minimum three layers of tight-woven material, breathability is more important than ever.
  2. It must be fairly simple to make, so we could keep the price down, and so we could produce them quickly for donation.  Since every single health authority says that wet masks should be changed AT ONCE, we all need to carry around three or four masks in the wintertime, meaning they can’t cost an arm and a leg.
  3. It must maintain its 3D loft and resist sagging, even if it gets damp.  For those of us in the North, rain/snow/condensing breath/runny noses are a fact of life now, and we do not want possibly contaminated, clammy fabric crumpling against our breathing holes.
  4. It needs to form a good seal around the nose to prevent glasses or sunglasses from fogging up, even in nasty weather.

The new mask style (well, new to Kitty, anyway)

For weeks I pounded my head against the sewing table, trying out design after design and rejecting them all.  Some were too complex, some stuck to my nose or mouth if I took a deep breath, some pulled down every time I talked or moved my jaws, some caved inward when a little moisture from my breath precipitated on them, and so forth. 

Finally, I struck upon the perfect idea, and there was much rejoicing.  Hurray and huzzah!

Then about two minutes after that, I found out that about eleventy-thousand other people had struck upon it already.

It turns out that this mask concept is already out there, and has been for months.   Origami enthusiasts, sewing mavens, and droves of millennial Youtubers had all gotten there before me. If there was an originator for the design, it has been obscured in the mists of time.

Which goes to show that even an elderly, experienced seamstress like myself can stand to learn from the internet.  I could have saved myself a deal of head-banging if I’d just sone a little Google search first.

In my defence, my version does contain several refinements of my own, which I really believe will make these masks a bit more comfortable and even a touch safer.

So here they are, these not-exactly-new but still kind of brilliant masks. If they have a standard name I haven’t found it, but we’re calling them Gondola masks, because that’s what they look like to me:

The selling points

First, these masks are comfortable.  Airy, lofty, with a metric buttload of breathing space.  We didn’t think anything would beat our Ziggurat masks for ease of breathing, but Felix and I both agreed that these are significantly better for sheer airflow, even with three layers of fabric.

Next, the 3D shape is genuinely self-supporting.  The pin-tucks work like reinforcing beams to help keep the huge “dome” of the mask high and dry, well off your nose and mouth.  Even when you deliberately inhale deeply, it’s all but impossible to suck the fabric down far enough to touch you.  If the mask does get wet from rain or snow, the fabric will stay lifted up instead of collapsing onto your face, which is rather important for safety.  

Observe how the mask dome stays up by itself

The dome is nice and tall — too tall to soak up those unspeakable fluids we all leak from time to time in the cold (it’s mainly water vapour from the air condensing in your breathing passages, but that sounds less fun).  

Because the path of least resistance means that your breath travel outward into that big space, it really minimizes fogging up of glasses.  I also scooped out a dip under the eyes, so the mask conforms better over the bridge of your nose, and doesn’t interfere with your vision — even when you wear it high enough.  You can see how nicely the mask sits against the nose here:

Close-Up showing the snug fit around the nose

By the way, next time you see someone in one of those disposable masks with the straight-across top, note how low-slung down their nose they’ve got it (and also note the big gaps that result at the sides of the nose).  They have to do it that way, because if they had it at the proper height, the straight top would wander into their eye region. So it’s either impaired vision or bad fit.  Either way, it’s dangerous.

If you want to use disposable filters

If you’re into filter pockets, this style does offer you the option.  No, not all mask styles work with filter pockets.  No matter what anyone tells you, adding a filter pocket to a pleated mask is an exercise in logical failure (it can be done, of course; it just negates the point of the pleats).  

Keep in mind that a filter pocket must perforce float free from the pin-tucks buttressing the mask’s structure, therefore may be more liable to get sucked up against your nose.  I have yet to find any supported studies indicating that disposable filters are better in any way than a three-layer mask, but you’ll need to decide for yourself if it’s worth it.

The negatives

Well, there really aren’t many.  This one is a winner in most respects.  

If you have a big beard you want to keep covered, or stubble that tends to catch on and pull down masks, you may want to stick to a mask style with pleats at chin level, like the Ziggurat mask.  Though Felix swears the Gondola mask doesn’t ride down even when he gets all stubbly, which is a complaint he has against all other non-pleated styles.

The Gondola mask does take up quite a lot of footprint on your face, which may be a plus or a minus depending on what you’re after.  It’s better coverage, but if you really don’t like the World War gas mask aesthetic, this style may not be for you.  

It’s uber-practical and perhaps lacking in elan.  If you’re attending a fashionable holiday masquerade, maybe try the Sparrowhawk mask instead.  Speaking of which….

Next time, the other new mask style

With the holiday season upon us, some of us are probably preparing to attend various gatherings.  In a world of mandatory face covering, I thought there’s a place for a mask made for glamour — all striking looks, but still not without practicality.  Kind of like a dramatic swirly cloak, as opposed to a parka.

If that sounds like your cup of amontillado, join me in the next instalment, in which Fairy God-Aunt Kitty makes masks for the kittens who want to attend the ball.  Guaranteed comfier and safer than glass slippers.

New Limited Quantity Mask Fabrics for December

December is just hours around the corner and we thought it would be fun to add a few holiday season fabrics to our mask collection. The following four fabrics are available in *very* limited quantities. When they’re gone, they’re gone. Here they are:


We’ve also added a larger quantity (but still limited) of the following blue cotton with a scroll and check pattern.

Blue Cotton with Scroll & Check Pattern

Happy Holidays!

How to add a filter pocket to your two-layer masks

An imperfect but fairly easy method (no sewing machine required)

By Kitty

As promised, here’s a relatively simple way to add filter pockets to your two-layer masks!

Some caveats before you begin

If you ordered or were given a mask from Felix & Kitty before November 2020, it was most likely a two-layer one, since that’s what was officially recommended back then.  If your mask if from the time after we updated our mask construction (to have either filter pockets or three layers), you don’t need this tutorial.

FYI, if you think it’s a good idea to add a filter pocket to a mask that already has three or more layers, you might want to reconsider.  Masks with more layers aren’t necessarily any safer, and depending on what you use and how thick the final product ends up being, may be considerably LESS safe.  

NOTE: If you want more info on which materials benefit from multiple layers and which you shouldn’t double up, find it here.

Will this tutorial work for all mask styles?

Yes and no.  You can use the same principles for any style of mask, but that doesn’t mean it’s always a good idea.

In general, the basics of this tutorial will work fine with any mask with some 3D contouring that does NOT contain any pleats.  These are two examples (an Anteater mask and a “Put on a good face” mask, in this instance) of the type.

I wouldn’t add a filter pocket to a totally flat mask (like those plain rectangles with ear loops), because this style already tends to have major gaps around the edges due to the fact that they don’t make any provisions for the mountains and valleys of your face. 

The added stiffness of the filter pocket will probably make the gaps even worse.  Also, since flat masks just sit, well, FLAT, a filter would end up plastered against your nose and mouth, which could be really unpleasant, depending on the material.

I also wouldn’t add a filter pocket to a pleated mask, mainly because a flat filter sitting on the inside of the pleats would 1) render them kind of pointless and 2) shift around too much.  

The whole point of pleats is to open and close to accommodate facial movement as you talk and move your mouth.  A filter would just sit on the pleats and restrict them from their fold/unfold motion, and even get pulled out of place when it gets caught up in that motion.

In fact, following a good deal of experimentation (the reason why this tutorial is much later than I originally intended), I believe filters just don’t play nicely with pleats.  More on this in an upcoming blog.  In the meantime, if you love pleated styles, maybe stick with three layers instead of filter pockets.

Materials you’ll need

If you have a sewing machine and are comfortable using one, great.  Otherwise, a needle and thread will work fine.  Or if you’re not into hand sewing, a reliable glue gun that uses non-toxic, washable glue that bonds fabrics will do as well.

You will need some kind of fabric or other material which will withstand repeated cleaning.  If you machine-wash and heat-dry your masks, make sure your filter pocket material will stand up to the same treatment. 

Unless you have a machine for finishing fabric raw edges, or really love hand-finishing them with a needle and thread (in which case you’re a bit peculiar), stick to materials that will not fray.  Felt, heavy knits without too much stretch, and non-woven fabrics are all options.  

Other than that, you’ll want a pen or pencil, some paper, and a pair of scissors.  A few pins and a ruler are helpful but not essential.  If you don’t have pins, you may want a few clothespins or paper clips, or even bobby pins.

The prep

If I were you, I’d pre-wash and dry whatever fabric you’re using, even if it’s not supposed to shrink.  You don’t want your filter pockets doing something unexpected in the laundry after you’ve gone to all that trouble adding them.  If they do shrink, they can distort the mask and cause gaps around its edges, which is a big safety no-no.  You have been warned.

Step 1: The pattern

NOTE: You can skip this step if you’re only doing one or two masks, and just trace directly onto your fabric.  But if you have more than a couple to do, it’s much easier to make a paper pattern first.

To make the pattern, lay your mask on a piece of paper.  Flatten out one of the side edges of the mask (where the straps or elastics are attached) against the paper, and keep flattening toward the interior of the mask as far as you can go before the shape gets too 3-dimensional to stay down.  Trace around the flattened portion only.

Tracing from your Mask

Once you’re done tracing, remove the mask, and draw a line (use a ruler of you have one handy) connecting the ends of your traced lines.  This connecting line is shown in blue in the photo below.

Connecting the Traced Lines

Cut out the shape with your scissors.

Pin (or just hold, if you don’t have pins) the cut-out paper pattern against the inside of your mask to double-check that it’s the right shape and size.  Trim the paper down if needed.

The Cut Out Pattern

If there’s any chance you might confuse which way points up (if it even matters; it won’t for masks whose shape is symmetrical up and down), draw an arrow on the pattern to remind yourself.

Pattern Pinned to Mask

Step 2: Cutting out your pattern pieces in fabric

Pin your paper pattern to your chosen fabric.  If you don’t have pins, you can just trace around the paper with a Sharpie or chalk.

Pattern Pinned to Fabric

Cut out the shape.  If you traced the outline with a sharpie, try to cut off all the Sharpie ink, or the piece may end up too big.

First Piece Ready for Cutting

Now, FLIP OVER your pattern piece and pin (or trace).  Cut out the other filter pocket.  If you don’t do the flip, you’ll end up with two lefts (or two rights).  Of course, if your fabric doesn’t have a wrong or right side, this may not matter at all.

Ready to Cut the Second Piece

Now you have two mirror-imaged pieces of fabric!

Step 3: Attaching the filter pocket to the mask

If you’re going to be sewing, pin one of the fabric filter pocket pieces to the INSIDE of your mask, right side up (wrong side of pocket fabric facing the mask lining).  If you don’t have pins, you could just hold it with your hand, if you’re fairly confident with your hand-sewing skills.  Or you can use paper clips, small clothespins, or bobby pins to hold the pocket onto the mask while you sew.

First Pocket Piece Pinned to Mask

Thread a needle.  I used a contrasting colour thread so you can see it more clearly, but you’ll probably want to use matching thread, if you have any.  I also used a HUGE needle, much larger than you want, again so it shows up better in the photos.  Seriously, use a normal-sized needle; the big one was a pain to shove through the fabric layers.

Needle and Contrasting Thread

Remember, you are only sewing on the pocket where it touches the EDGES of the mask, not the bit that opens into the interior.  This is the pocket opening, so don’t sew it closed.  The next photo shows the most logical place to start the sewing.

Too-Large Needle for Illustrating the First Stitch

I’m not going to attempt to teach you hand sewing stitches here; there are loads of tutorials out there if you have no idea where to begin.  I’m using a simple overcast stitch, which isn’t any better or worse than many other possible stitches.

A Few Stitches In

As you can see, my stitches are neither even nor perfect.  I don’t much like hand-stitching, and I wanted to get this tutorial out quickly more than I wanted to make perfectly spaced beautiful stitches.  Remind yourself that it doesn’t have to look pretty to do the job, and don’t stress too much about your stitch quality, as long as everything stays on securely.  Just keep sewing around the edge.

When you reach the end, tie off your thread securely so your sewing doesn’t come undone, or back-stitch several times.  Remember not to stitch the opening of the filter pocket closed.  Huzzah!  You’re done.  With one side, anyway.

Now you do the same on the other side.  I sewed mine on by machine for comparison.

IF YOU ARE USING GLUE: Run a thin line of glue on the WRONG side of your filter pocket pieces, around the edges which will be attached to the mask.  Don’t put glue on the edge that will become the pocket opening! Following manufacturer’s directions for your glue, adhere the pocket to the inside edge of the mask.

Using the filter pocket

I tested out my new filter pockets using a coffee filter, but you can use any filter material you prefer, so long as it’s safe and reasonably breathable. If you’re not sure which one is for you, you might want to review the pros and cons of some options here.  

Mask and Coffee Filter

With CLEAN hands, fold the filter to make it fit, if needed.  Tuck the edges securely into the pockets on both sides to make sure they’ll stay put.  

Push the middle of the filter into the bowl of the mask to keep it somewhat clear of your face.  Now the mask and filter are ready to use.

All Done

Remove the filter after each use, and discard.  If it gets damp, you should replace it immediately, as soon as you can get your hands clean.  ALWAYS launder the mask before re-using!

So is this method of attaching filter pockets ideal?

Well, no.  Of course not.  

This tutorial lets you salvage those two-layer masks you acquired before the guidelines got changed on us, so you can get a bit more use out of them.  It isn’t meant to replace masks with purpose-built filter pockets, and definitely won’t do a perfect job — any filter you use with this method WILL touch your skin directly, and you could have a hard time keeping it clear of your nose and mouth.    

When I make masks with filter pockets from scratch, the pocket is designed to be a structural part of the mask, and covers the masks’s whole interior surface (the bits that go over your airways, anyway).  The filter then goes between the outer layer of the mask and the filter pocket/lining layer, meaning the filter itself never directly touches you.  This could be important; for example, some filter materials can be too abrasive when placed against sensitive facial skin.

This also means any filter will sit much more securely within the pockets with no danger of slipping out.  Since the filter pocket is made to follow any 3D shaping the mask itself has, the filter is kept lifted off your face, so you don’t accidentally get a noseful of filter if you breathe in too suddenly.

All the same, if you follow this tutorial method, you end up with masks that are compliant with the official recommendations, provided you use the right filters with it.  While I didn’t love the feel of the filters against my skin when I tested this out, it was perfectly serviceable, and still far more comfy than those one-size-fits-none disposable masks.

What to do with two-layer masks (if you can’t be arsed to do all this sewing)

I ended up donating my entire stock of two-layer masks (which I already had made when the guidelines changed) to a homeless shelter after adding filter pockets, which is a sight better than wasting them.  

If you have a sewing machine (or just a needle and lots of free time on your hands), but would prefer to switch to purpose-built masks with filter pockets and/or three-layer masks, you could do the same.

Or just sanitize and donate them as-is.  Seriously, ANY mask is better than no mask at all, and your local shelter will be glad to have them, filter pocket or no.  They also have the option of using two masks at once, one over the other, to get more layers (you could do this too, if the masks materials are breathable enough and the double elastic doesn’t bother your ears).  You never know — you could save someone’s life.

Next time on Aunty Kitty’s Mask Adventures

I’ll be trying to come up with a mask style with LOTS of extra breathing space to compensate for that third layer.  And no pleats, so it’s filter pocket-friendly for those of us who want one.  But it’s somehow still got to accommodate longer chins or large beards, sans pleats.  A challenge indeed.  

Also, hopefully, it will be simple enough in design and construction so it’s relatively affordable.  We’ll need that, since it’s been officially made very clear that we should all have several masks in rotation at any given time (because we really are supposed to change them whenever they get damp or soiled).  

Winter is here, Kittens.  That means your mask will get soggy from condensed exhaled breath when you go outside, so make sure you have two or three extra masks (sealed in a clean zippy bag) stowed in your purse/knapsack/bum bag/cleavage at all times.

Until next time, happy crafting!

The Big Mask Update – Part 3

An exhaustive (and exhausting) list of mask filter options, with pros and cons

By Kitty

In part 1 and part 2 of this series, I talked about the new recommendations regarding mask construction and procedures, the disposable mask issue, and the pros and cons of 3-layered masks vs. 2-layered masks with filter pockets.

This time, let’s talk mask filters.  Specifically, what your options are, their availability and safety, and why you might or might not want to use them.  Of course, this isn’t a complete list, because if you can name a material, someone’s probably gone and tried it, however bonkers.  These are just the things I’ve seen making the internet rounds.

DISCLAIMER: As always, nothing in this article is meant to be official medical or safety advice.  Everything presented here is either publicly available information that’s considered accurate at the time of writing, or just my opinion.  If you have health-related questions regarding the pandemic (or anything else), you should seek answers from your health care professional, not a sewing lady off the internet. 

The boring science-y bit (skip at your own risk)

Sorry, I know this is kind of dull, but it still has to be said.  Getting proper, reliable data from studies take time and funding and replication, and this pandemic is still pretty new in the grand scheme. 

The good news is that lot of studies regarding mask materials and safety seem to be in the works, but I wasn’t able to find many that have been published and reviewed, never mind reproduced.  This means there’s a lot of conflicting information out there, and what there is suffers from fuzzy definitions.

In the interest of not making this blog the length of a bible, I won’t be dwelling on the technical details of the studies I did find.  OR going into detail on a laboratory’s set-up of the equipment.  Or digressing into why sometimes it’s harder to capture larger particles than the smaller ones. OR complaining (much) about the non-standardized terminology some sources use when they publicize their findings. 

However, both the scientist and seamstress parts of me are somewhat outraged when I see test items like  “kitchen towel” or “cotton T-shirt.”  How thick a towel, what weave density, and what fibre content?  How thick a T-shirt, what kind of knit, and how tightly stretched was it, which hugely affects the space between thread loops in knit materials?

The point is that no one REALLY knows how well any of these materials work in real-life face masks right now, and even when there’s data being quoted, it might not mean what it sounds like.  One T-shirt could block only 10% of tested particles, but a heavier one might block 80% but only if you stretch it no further than 12%, and so on.  Test results for the same listed item (like “cotton T-shirt”) can vary wildly from study to study and source to source, partly due to that aforementioned lack of standardization.  Basically, trust no one, and use your own best judgment.

Filter material safety

I’ll mention safety information provided by manufacturers or retailers when I have it, but it should all be taken with a giant pinch of salt.  Different sources sometimes have conflicting opinions on an item — even on the exact same brand of an item.  Read material safety info and/or data sheets yourself whenever you can find them, but remember they don’t tell the whole story either.

For your reference

A naked SARS-CoV-2 virus (not encased in a droplet of fluid) runs about 0.05 to 0.15 microns, depending on who you ask.  Wearing the droplet, it’s 3-20 microns, give or take. 

Whether it can get airborne without its protective droplet coat and survive for any length of time is currently a question mark.  When we know this for sure, we’ll be much better equipped to decide what works and what doesn’t.

List of Potential Filter Materials. 

With that out of the way, here comes the actual list of potential materials.

Non-woven polypropylene or “PP” fabric (the kind used in some reusable shopping bags)

PROS: This is what the official Canadian recommendations say is the preferred choice for a third layer.  Available, if only by chopping up shopping bags (check to make sure it’s the right kind, though).  Washable and reusable.  Good breathability, good enough so you can use multiple layers to boost effectiveness if you’re so inclined.  Higher-quality PP fabrics are pretty durable, though not like, say, high-thread-count cotton is.

CONS: PP fabric can develop thin spots or otherwise lose structural integrity in ways that aren’t obvious unless you look closely.  Meaning you really have to keep checking.  Some, though not all, shed little flecks and bits as they get more worn.  One test found PP grocery bags only captured 11% of particles 0.3 microns and under, which is worse than bedsheets, kitchen towels, and coffee filters, among others — remember, that’s just in *this* study (others could say something totally different).  

Cotton T-shirt material

PROS: Cheap, easily available, and easy to DIY into reusable, washable filters.  Knit materials don’t fray, so you don’t need to finish the edges of your self-cut T-shirt filters.  Very breathable.  Mostly safe to have on your face.  Using a double layer boosts effectiveness, and is doable for some, since it is so breathable.  According to the Cambridge study (if you’ve been looking up mask material studies, you’ll have seen this one by now), one of the best for capturing droplets.  However….

CONS: One of the *worst* materials for catching particles 0.3 micron and under (only about 3%) according to a more recent test, though this one apparently used a much thinner and more lightweight material than the Cambridge study (remember what I was saying about standardization?  The specifics really do matter).  Pieces cut from T-shirt knits tend to curl up when laundered, so can be a real hassle to insert into filter pockets.

Those blue shop towels

PROS: Fairly easy to find in home improvement stores.  Easy to cut up into your own disposable filters.  Okay breathability, but not great.  Some tests say blue shop towels, especially those made from polyester hydro-knit or polypropylene, are quite effective at filtering droplets, though possibly less so than regular paper towels or cotton sheets.

CONS: Not reusable.  Some safety data sheets say they contain toxic chemicals and/or carcinogenic particulates (if you inhale them, that is, not when you wipe your hands), while others don’t.  This is a case where different sources don’t agree on the same product.  One source says the tested brand filtered under 20% of 0.3 micron and smaller particles, which isn’t stellar.

Common-o’-garden kitchen paper towels

PROS: Surprisingly good at filtering larger virus-sized and droplet-sized particles, according to at least one source.  Inexpensive, easily available, and easy to make DIY filters.  Quite breathable.

CONS: Not reusable.   Not as good at filtering Coronavirus-sized particles as droplet-sized ones.  One source said paper towels filtered 33% of 0.3 micron particles (which is actually better than lots of other materials, but not great).   So how well this works may depend on whether viruses can survive in the air without that droplet.  Doubling paper towel layers doesn’t help much with effectiveness.

Coffee filters

PROS: Cheap and easily available.  Said to be very effective by at least one test, though results may vary between brands.  Comes pre-cut into manageable sizes.  The American CDC recommends it as a disposable layer for improvised face coverings, though they say nothing about why.  Doesn’t cause moisture condensation.

CONS: Not reusable.  It might just be me, but I found coffee filters REALLY hard to breathe through, which is a huge problem for those who agree with me.

Felt, synthetic or wool

PROS: Easily available and cheap if you stick to synthetic craft felt.  Reusable and washable, though durability differs by type (wool is durable, synthetic less so).  It doesn’t fray when cut, so you don’t need to finish the raw edges.  Reasonably easy to breath through, though this will vary depending on thickness and density of fibres.  Wool felt wicks moisture VERY well, and prevents condensation.  Some sources say felt’s tangled structure makes an effective barrier for pathogens.

CONS: Can be expensive if you choose wool felt.  Synthetic felt can cause moisture condensation, and some kinds may not hold up through multiple washings.

Dryer sheets

PROS: Easily available and made from non-woven material.

CONS: Full of who-knows-what chemical additives, and usually fragrances, none of which were meant to be snuffled close up.  Breathability is hard to test through all that.  I wouldn’t do this one.

Interfacing, non-woven (woven interfacing is just general fabric, really)

PROS: Meets the “non-woven fabric” recommendation for one of your three layers.  Reusable and washable, at least somewhat.  Comes in lots of different thicknesses and finishes, so you can pick one you like.  Lightweight ones are fairly breathable, though possibly less of a barrier than the heavyweight ones.  Doesn’t fray, so you don’t need to finish the edges.  Easy to find in a fabric store or online.

CONS: Can get expensive, and heavier ones definitely don’t breathe well.  Not durable through multiple launderings.  Some types can develop irregular thin spots when washed.  If anyone’s specifically conducted a test on interfacing’s filtering ability, I haven’t been able to find it.

Batting

PROS: Easy enough to get, if you know what it is.  Washable and reusable.  Cozy for outdoor winter masks, since it’s often used to add warmth to sewn items. 

CONS: Nobody’s tested it that I know of, but since batting is actually designed to have lots of air space in it, I can’t imagine it would make a good barrier for anything.  Also, washing and drying sometimes creates irregular thin and thick spots.  Too warm to wear indoors, and not too breathable.

Dust and/or pollution filtration mask filters (usually rated PM2.5)

PROS: At least one study found these highly effective (97+%) at blocking tested particles, including air pollutants.  Since they’re already meant to go into a mask, they’re reasonably safe to wear on your face.  Supposedly quite breathable (I wasn’t able to get any, but it seems logical, for the same reason).

CONS: Supplies seem spotty right now.  Can be expensive.  Not reusable.  The study didn’t test for particles as small as a solo coronavirus when it’s not encased in a droplet, so we have no idea how these performs against airborne viruses (many air pollution mask filters are rated to block 2.5 microns, which is a LOT bigger than the virus that causes COVID-19, but smaller than the droplet in which the virus usually travels). 

HVAC system filters/home air filters

PROS: Fairly easy to find at home improvement stores.  One layer is more breathable than you might suppose.  Can be quite effective as a particle barrier, though how small a particle can get through depends on its rating (most will stop anything droplet-sized, though).  One test found HEPA filters stopped more than 80% of 0.3 micron-sized particles.

CONS: Not reusable.  Expensive.  Not tested for safety as a face mask material.  Even true HEPA-type filters aren’t usually rated to stop particles much smaller than 0.3 microns.  Most manufacturers explicitly recommend against using home air filters for face masks.  Some may contain components which are unsafe if inhaled.

Vacuum cleaner bags

PROS: Available, if somewhat spottily right now.  Some health professionals have recommended HEPA vacuum bags as an option for face masks.  Studies show they are very good at capturing even small droplets and large viruses (but not coronavirus-sized ones).

CONS: Not reusable.  Not tested for safety in face masks; some do contain materials that may be quite  dangerous if you inhale them. Most are very hard to breathe through, which creates problems all by itself.  Personally, I’d stay away from this one.

Wet wipes/baby wipes/pre-moistened towelettes

PROS: Er…They come in a carrying case?

CONS: They’re *wet*, people.  Wet = bad in masks, even if they’re wet with just water or something fairly harmless.  Some are soaked in an alcohol-heavy solution, which may be virus-unfriendly, but it’s also unfriendly to your airways.  Just don’t.  I wouldn’t even have mentioned this one, except it really is floating around out there.

Pads/sanitary napkins/panty liners and disposable diapers

PROS: Still widely available. 

CONS: Not at all breathable, even the thinnest types.  Many contain chemicals or gelling agents which are NOT intended for you to inhale.  Never even tested for effectiveness at filtering pathogens, as far as I can make out, but it surely doesn’t matter, as no one can breathe through these anyway.  Another option I was surprised to even see existed.

Bandanas, socks, handkerchiefs, scarves, towels, bra pads, underwear, nylons, etc (assorted items of clothing or household fabric goods)

PROS: Everyone has them lying around.  Usually washable.  Some (and only some) of them probably work as well as anything else.  In general, breathable material with a very close weave or tight knit pattern will do okay as barriers (you should NOT be able to see any spaces between threads or yarns when you hold it up to the light).

CONS: How effective any of these things may be depends ENTIRELY on its individual characteristics, so it’s all on you to decide.  Loose-woven or loose-knit materials make terrible filters.  The cut edges of some fabrics will need to be finished to prevent them from disintegrating when washed.  Incidentally, cotton bandanas were cited as some of the worst materials at blocking particles by some studies, though they didn’t say what weight or weave (cheap bandanas are normally made from thin, low-thread-count cotton). 

Gore-Tex (and other ePTFE fabrics)

PROS: Lets air and water vapour through, but not liquid droplets.  In principle, this makes ePTFE fabric both waterproof and condensation-proof (exhaled moisture should pass through instead of condensing on it).  I couldn’t find any studies regarding its effectiveness as a viral barrier, but it’s essentially a uniform film with micropores, so there are unlikely to be any thin spots or gaps.  Very durable in structure.

CONS: The manufacturer specifically states that this fabric doesn’t allow for enough airflow when used in a face mask, and that it doesn’t protect against airborne pathogens. Expensive.  Detergents can damage the waterproof qualities.  Air-permeable or not, I find it hard to actually get a lungful of air through Gore-Tex, which in itself makes it a bad option. 

Surgical sterilization wrap (Halyard and Medline are a couple of manufacturers)

PROS: Extremely effective at blocking particles (and just about everything else), which isn’t surprising, as this is what they use to keep instruments sterile for surgery in hospitals.  Technically, it can block more particles than N95 masks.  Definitely ticks the “non-woven polypropylene” box, in spades.   Comes in lots of different weights.   I don’t have access to any right now, and I can’t recall ever trying to snort air through it when I did, but I’m told it’s reasonably breathable. 

CONS: Hard to source, unless you have a line on surgical supplies, and expensive if you do find it.  Not reusable.  Not actually tested for safety or effectiveness in face masks, though at least a few medical professionals are trying out the material in masks for themselves, so we’ll see if anyone does a study.  The manufacturers say it’s not intended for masks, and they can’t support its use for the purpose.

The redundant option: Tightly-woven breathable fabric, like quilting cotton

Note: the reason I feel kind of silly mentioning this one is that if you’re going to use this as a filter, you might as well just make a three-layer mask and skip the filter pocket altogether.  But if you want to use high-quality cotton as a removable filter for reasons of your own, here are the pros and cons.

PROS: Super-breathable.  Most sources that tested this material found it to be at least moderate to good at capturing particles.  Easy to find, very durable, washable, and available in lots of colours, finishes, and weights.  Safe to wear against skin.  Moisture won’t condense on it.

CONS: Cut edges will fray, so you’ll need to finish them in some way.  Not a non-woven polypropylene-type thing, so not the first choice for official government recommendation for the third mask layer (they do mention cotton and linen as acceptable alternatives, though).

So what would Felix and Kitty use?

Your aged aunt Kitty doesn’t even carry a phone or a purse, because she’ll forget anything that isn’t sewn on.  In the same vein, I just know that I’d forget to pop a filter into my mask pocket every time I step outside for some kibble. 

For myself, I’m sticking with a mask made from high-thread-count, good-quality, breathable woven fabric.  Only now, I’ll use three layers instead of the previously recommended two.  Felix will most likely do the same, because he likes masks with pleats, which don’t play well with removable filters. 

I’ll most likely switch entirely to a style with lots of 3D space over my nose and mouth, like my Anteater or Ziggurat masks, because that extra layer means I will want all the extra breathing room I can get.  In fact, I’ve started to test out a few other styles with even more nose clearance, just in case we need them.

If I *had* to pick a filter for some reason, I’d try out the surgical wrap, if I could get it and assuming there was no danger of hospitals running short.  Of the more easily available options, I might try out wool felt and thick cotton T-shirts (they seem safer to me), and in a pinch, plain old kitchen paper towels. 

Why NOT polypropylene, like the official recommendation says?

This is just personal, but I don’t entirely trust a lot of non-woven materials.  Over many years of sewing, I’ve observed that many shed some dubious bits and bobs (aka fibres and particulates) when they get a bit shabby.  You see, dear Kittens, PP is basically a thermoplastic, and I feel like we swallow/breathe enough microscopic plastic particles every day without adding even more.

Also, some PP fabrics develop thin spots as they get worn, which are a hazard in masks.  If you have a reusable PP shopping bag that’s been through the wash a dozen times or more, try holding it up against the light.  Quite often, you’ll see semi-translucent patches.  Compare that with a solid cotton bedsheet you’ve washed and dried a hundred times, and you may start to see my point about durability differences.

In conclusion

This has gone on far longer than any blog should, so I’ll wrap it up.  Though I have much more to say on the subject of masks, filters, and updated safety data, which I’ll spout sooner or later.

I’ll put out that tutorial on retro-fitting filter pockets as soon as I can come up with a no-machine-sewing method that halfway works.  It’s turning out harder than I anticipated.

And hopefully, I can come up with a 3-layer/pocket-enabled, 3D mask style that 1) provides as much breathing space as my Ziggurat masks but 2) can accommodate a filter for those who want to use one and 3) is a bit simpler in structure, so it’s more affordable to buy and/or easier to produce for donation. 

Until next time, stay safe and warm, and try not to huff any thermoplastic crumbs….